Adding iCloud backups
To start working with iCloud backups:
1.In the Backups Library pane, click the Acquire data for Applle iOS device icon ![]() .
.
2.In the opened menu, click the Download iCloud backup icon ![]() .
.
3.In the opened window, enter your Apple ID and password or authentication token, extracted via EPB. Click Sign in.
NOTE: If the Apple ID is protected with two-factor authentication, you need to confirm sending the verification code to all of your trusted devices or to your phone.
You can select the Save user credentials for future sessions option when logging in. If this option is selected, the entered login and password will be saved to be quickly added into corresponding fields during next login.
Please note that after logging in the authentication token is saved and the Verification code is no longer required to be entered for the account in case of two-step verification or two-factor authentication.
4.If the Apple ID is protected with two-step verification, verify your account by selecting one of the following authentication types:
▪Secure Code: in the Trusted device field, select a phone number or a trusted device to which the code will be sent, click Get code, and then enter the received 4-digit code in the Secure code field.
▪Recovery Key: enter a 14-character key generated in the Apple account settings.
Click Verify.
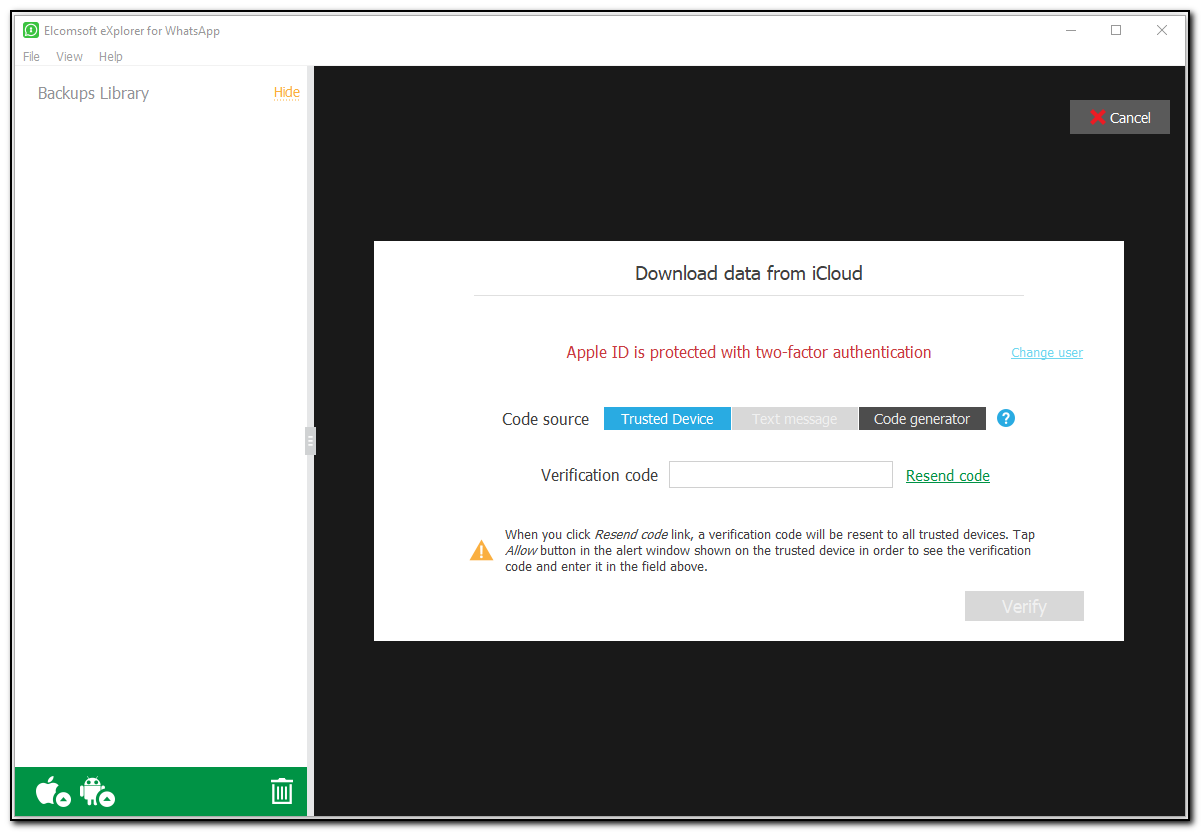
If the Apple ID is protected with two-factor authentication, perform authentication in one of the following ways:
▪Select Trusted Device and enter the 6-digit code in the Verification code field. Click Resend code for the verification code to be sent to all trusted devices.
▪Select Code generator and enter the 6-digit code in the Verification code field. The code is generated on the trusted device or via Cloud Panel.
NOTE: The current version of EXWA does not support authentication via the Text message.
Click Verify.
5. Once the backup is downloaded and iCloud data is processed, the following Apple ID information is displayed:
•Display name
•Apple Id
•Person Id
•Auth Type
•Storage Total Size
•Storage Used Size
The lower part of the window displays the information about backed up devices linked to the target Apple Id, their names and device types, as well as the following information:
•Apple Id
•Unique device
•Product Type
•Serial number
•Backup date (according to the time zone and date format defined on the local PC)
•Backup size
Click the target device in the Backups Library to the left. The following device information is displayed:
•Device name
•Display name
•Apple Id
•Unique device
•Product Type
•Serial number
•Backup date (according to the time zone and date format defined on the local PC)
•Backup size
The lower part of the window shows all WhatsApp backups available for the selected device with the following information:
•Apple Id
•Phone number
•Unique device
•Full user name
•Client version
•Status
•Size
Viewing data
When you select the target WhatsApp backup in the Backups Library, the lower part of the window displays all plugins available (some of them might be disabled if there is no appropriate information in backup):
Click the plugin icon to view the contents.
Exporting data
EXWA allows you to export data from a backup to your PC. Data is exported to an XLSX file, and all attachments/files are saved to a folder in the same location as the XLSX file.
Please note that data export is only available in the registered version of the program.
To export data, do the following:
1. In the Data View pane, click Export data.
2. Select the data categories to export.
3. Define the time interval for which you want to export data as follows: enable filters by switching the On/Off toggle and then select the dates in the From and Until fields.
4. Click Export.
5. The window will open in which you can select the location for exported data.
6. Once you select the location, click Save.
7. Data export will start.
8. To open exported data, click the icon next to the Data has been exported message highlighted in yellow or open it from the location to which it was saved.